Showing posts with label Hats. Show all posts

Thursday, January 17, 2013

I STILL Need a Hat

While I haven't finished up my Shoal Bay Slouch posts, I have finished the hat. Bill took a few pics of me wearing the hat.
Turns out I didn't wear this one for very long. I gave it away to our friend Karlena. Luckily, I had enough yarn to knit a second one.

That one went with me when we flew to Fort Worth for Christmas with my family ... but it didn't come back.

Saturday, October 20, 2012

Shoal Bay Slouch - Part 5, Almost finished

After popping the apple crisp in the oven and planning what to make for dinner (butternut squash curry), I sat back down and picked up where I left off (part 4).

A few rounds more and it became quite apparent to me that my decrease-marker-positioning math was wrong.

I finished my jogless join rounds
and still had 4 stitches between my end-of-round marker (yellow) and my decrease marker (blue).

My mistake was 4 x 2 for the decreases. Because, of course, when you knit 2 stitches together you don't end up with 0 stitches you end up with 1 stitch. It took me a minute to figure out the right calculations.

Shoal Bay Slouch - Part 4, More knitting

Yesterday afternoon, I went to the post office and dropped off the last 2 boxes for my conference next week and that means my work week is finished and I can knit.

When I set my project aside, I had finished the braided edge, the ribbing and the first few rounds of the main body of the hat. (Part 1, part 2 & part 3 have those details.)

I completed the first repeat of the pattern and then the second repeat and then set it aside for the night. I had come to the point where I needed to plan the crown and decided I should do that in the morning. (I tend to make mistakes when I'm tired.)

Back again after a good nights sleep, I set about planning my crown decreases. I've already figured out that I'll make 8 decreases on each decrease round and I'm planning to make the decreases at the same point in each round. My math is 112 ÷ 8 = 14 stitches between each initial decrease location and 8 stitches remaining (1 between each decrease location) after 13 decrease rounds.

Sunday, October 14, 2012

Shoal Bay Slouch - Part 3, Knitting

Oh joy, oh bliss, it's time to cast on and start knitting.

Having done my swatching, blocking (Part 1) and pattern planning (Part 2) earlier this afternoon, I just had to get started with the actual knitting.

I cast-on and did the braid (mentioned in Part 2 with a link to a video). I had an ugly twisted mess at the end of the first purl round, but by the end of the second purl round the twists were gone. I knit an inch of 1x1 rib and considered doing another round of braid, but decided against it.
 I really like this braided edge!

Shoal Bay Slouch - Part 2, Developing the Pattern

Having figured out my yarn and pattern and finished my gauge swatch (Part 1, Preparation), now it was time to plan my pattern. Since this is all math (and no photo opportunities), I thought I'd throw in a couple shots of my knitting environment.

My head is 22-inches around and a couple pattern standards documents I've found recommend anywhere from 1 to 2 inches of negative ease for a close-fitting hat. My idea is a bit of a slouchy hat, but I want the ribbed brim to fit. So, my brim measurement should be 20-21 inches. Using my 1x1 rib gauge of 16 st = 3-inches
     21 ÷ 3 = 7 and 7 x 16 = 112 stitches
     20 ÷ 3 = 6.67 and 6.67 x 16 = 106.7 stitches

I've noticed that many hat patterns use an 8 "gore" decrease in the crown section and 112 divides evenly by 8 to 14 stitches, so I decided to go with 112 stitches.
(I was sitting in the gray chair when I did these calculations. Bill usually sits in the brown one. We're still a few items shy in our home decorating and are using storage boxes as side tables.)

Shoal Bay Slouch - Part 1, Preparation

Now that fall has arrived and since I Still Need a Hat, I decided to peruse my stash. I played with a couple choices and eventually settled on this:
The yarn is somewhat thick-and-thin and has a fine strand in tan that's twisted together with a much thicker variegated strand. I have 4 skeins - 2 with lighter toned variegated yarn and 2 with darker toned variegated yarn - and I have no idea where or when I may have acquired this yarn.

Reading the label, the yarn is called "Montreux", it's 77% wool and 23% acrylic and it's made by Southern Cross Yarns. The skeins are 50 g (81.5 m), recommended needle size is 5.50 mm with a gauge of 16 st = 10 cm. (5.50 mm = US 9. 10 cm ≈ 4 in.)
Since I'm planning to make a hat, I'll need double-pointed needles and 16-in circular needles. Yeah, if I need to, I can make this work with a pair of circulars instead of the DPs and the 16-inch circs, but using 2 circs to knit round isn't my preferred method ... yet. (I've changed my mind on things like this in the past and fully expect to do it again.) I have DPs and 16-inch circs in size 6 (4.25 mm), so that's where I'll start my swatching.

I played with a few pattern stitches, but soon decided to let the yarn be the focus. I tried a welt stitch in the darker yarn - to give it a bit of texture ...

Sunday, January 8, 2012

I Still Need a Hat

Back in December, I was working on a hat - for myself - and wrote several posts about it (starting out and working the cross stitch without a cable needle version 1 and version 2). Also back in December - while I was putting the finishing touches on the hat - Bill & I traveled to Augusta, Georgia to visit my parents and my sister Jeanne.

Jeanne thought the hat was cute and I thought the hat looked good on her. Here she is sitting on my parent's front porch wearing the prototype Moss and Cross Hat.
As noted in my initial "I Need a Hat" post, the hat is knit from the top down. (I hadn't figured out exactly what I wanted to do, so I started at the top and figured I'd try it on as I knit.)

Friday, December 9, 2011

I Need a Hat - The Cross Stitch, version 2

In my previous post, I showed the method I've been using for the 1-over-2 left cross from my first "I Need a Hat" post. (I think I'm going to call this hat "Moss & Cross".) It's a cabling-without-a-cable-needle method that is quick and easy, but does involve leaving a stitch "hanging out", completely unsecured while you work 2 other stitches.

The following is an alternate method for cabling-without-a-needle.

Here we are at round 5 again. (The first stitch on the left needle has been slipped in each of the previous 2 rounds.)

Begin by slipping the next 3 stitches from the left needle to the right needle. One ...
Two ...
Three ...

Wednesday, December 7, 2011

I Need a Hat - The Cross Stitch

In working the "cross" portion of the pattern stitch I'm using for this hat (described in my first "I Need a Hat" post), I've been doing the cross without a cable needle. So, I thought I'd take some photos of the technique I'm using.

Here we are in round 5 of the pattern. (Having worked slip 1, knit 2 in rounds 3 and 4.)
The first stitch on the left needle is the slip stitch - the stitch that will be crossed over the next 2 stitches on the left needle. What I do is drop the slip stitch off the needle, then knit the next 2 stitches, then pick up the dropped stitch and knit it.

Yep, I just leave that first stitch hanging out in front of the work, completely unsecured by a needle. Since it was slipped in the previous 2 rounds, it isn't directly connected to the other stitches in this round and therefore, it's much less likely to work it's way out while you're working the other stitches. It helps that in this pattern, the stitch only has to "hang out" while you work 2 stitches and then it's picked up and all secure again. Finally, the yarn itself is a little "sticky" and that helps as well.

So, here we go.

I usually just slip the stitch off the needle, but if you want to give yourself a bit of extra insurance you can use the right needle to give the stitch a little tug.

Saturday, December 3, 2011

I Need a Hat

A couple weeks ago, I gave away the last of my hand-knit hats, which - of course - means it's time for me to get started knitting a new one.

First though, I should mention that I have a "thing" about itchy hats. In my quest to overcome itchiness, I've tried a variety of different fibers (merino wool, superwash wool, alpaca, angora) and techniques (standard knitting, fulling, etc.) and have finally come to the conclusion that I simply need to line any part of the hat that will come in close enough contact with my skin to cause itchiness. (Reference Bill's hat.)

Because (for anyone who isn't familiar with this) ... an itchy hat is just awful!! It's nice and soft and warm and then all of a sudden it's ITCHY ... and to alleviate the itchiness, it MUST be removed IMMEDIATELY ... at which point all its nice, soft, warm qualities are absolutely worthless!!

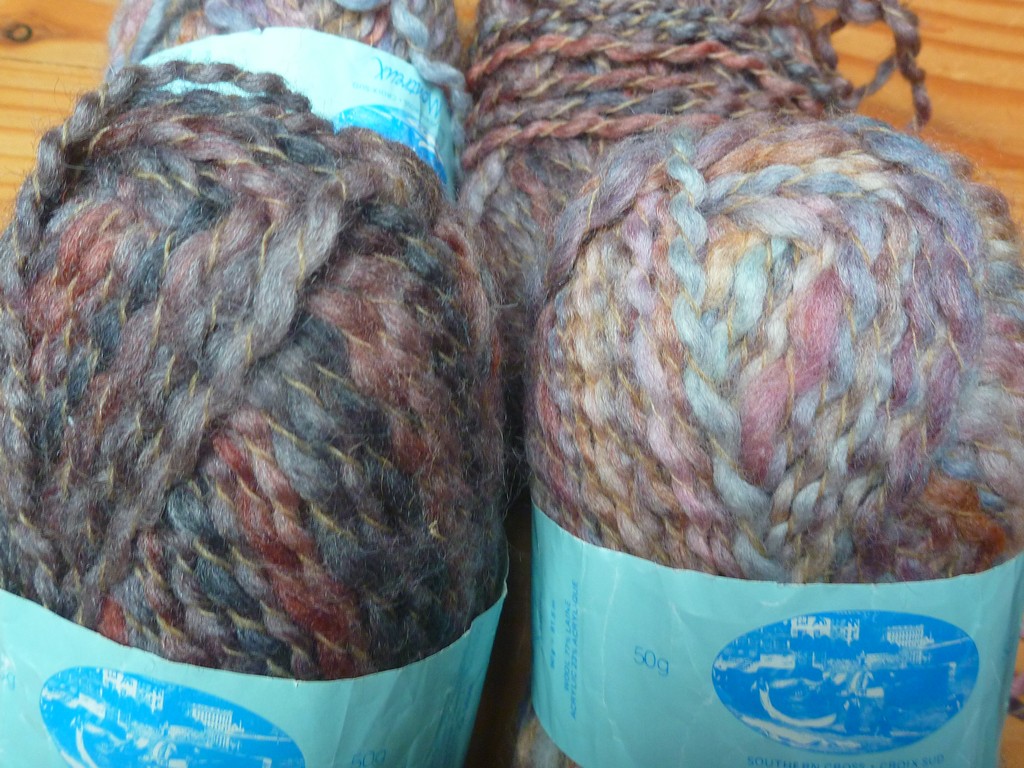
OK, back to this hat. I went to my stash and picked a yarn I've used before - Valley Yarns Deerfield (alpaca & silk).

This is a lovely, soft, fairly non-itchy yarn. However, from past experience, I know it will eventually get itchy at my forehead and around my face. So, I will plan to line that section at a minimum.

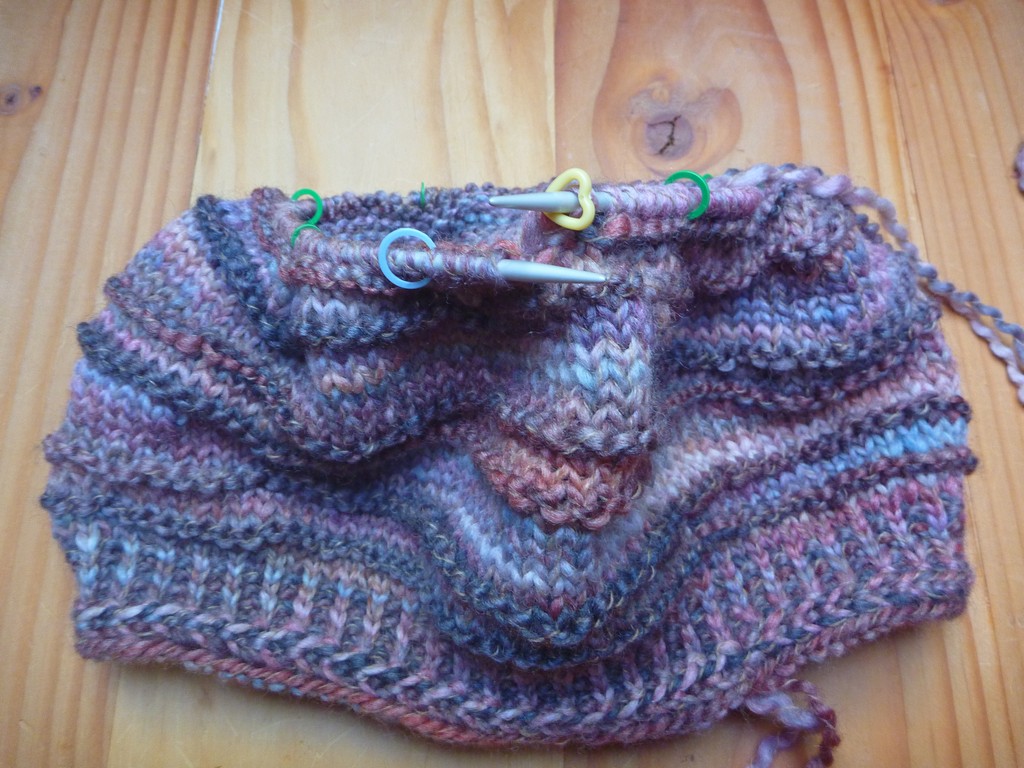
Because I hadn't figured out the exact details of this hat, I decided to start at the top. (After having knit and blocked a gauge swatch.)
(These photos are over exposed and don't show the color correctly.)

The pattern is a 9 stitch/6 row repeat of a 3-stitch cross stitch with moss/seed stitch between. The 3-stitch cross pattern is:
  • R1 & 2: k3
  • R3 & 4: slip 1, k2
  • R5: 1/2Lcross (1 over 2 left cross)
  • R6: k3
And here's where I am as of today.
If all goes well, I should have a new hat within the next couple days ... and hopefully, some better photos!!

Wednesday, November 30, 2011

Hat for Bill - part 2

Having knit the hat one time in it's entirety and then ripped it all out (see my previous post), I started up again. This time, I went with the 1-1½-inch negative ease, I knit the entire lining in stockinette stitch ... and I remembered to take a couple "in progress" photos.

I modified the process just a little by leaving the provisional yarn at the bottom of the lining and picking up the main yarn there. So the revised process was:
  1. Provisional cast on using lining yarn and work about an inch. 
  2. Pick up stitches at provisional cast on. Using main main yarn, work a couple rounds, then work a turning round and work back up to even with lining "fabric".
  3. Join the main "fabric" and the lining "fabric" together.
  4. Work the rest of the lining and the rest of the main hat separately.
  5. Tack the pieces together at the top.

Sunday, November 27, 2011

Hat for Bill - part 1

This is the hat to go with the "Gloves (and then a Hat) for Bill" that I posted almost 2 months ago now. It took a while to work this out (obviously) ... and the 2 (or was it 3) re-knits definitely slowed me down.

The first issue was the yarn. It is way too itchy to work on its own and Bill wanted a simple close fitting hat, so I knew I'd need to line the entire hat. As an old hand at sewing, I knew I could sew in a lining, but this is knitting and it seems to me that a knit hat should have a knit lining. So (he-he) I picked up some Ella Rae Bamboo Silk yarn (70% bamboo, 30% silk) in Pumpkin.
The color really is a pumpkin orange and not as bright as it appears in these photos. Nevertheless, it isn't a "match" for the Classic Elite Desert yarn ...
but the yarn and the color work great for Bill and after all that's what really matters!

Tuesday, September 20, 2011

Cherie's Hat

The incredible, wonderful, amazing Cherie came up for a visit a few weeks ago and that prompted me to finally put the finishing touches on a hat I had started about a year ago. This was one of those projects where the recipient wasn't planned from the beginning, but became clear by the end. Everything about this hat makes me think of Cherie.

Cherie and I both re-located from southern California to the Pacific Northwest within the last 5 years (me from Sherman Oaks, Cherie from Santa Monica). We had both lived in SoCal for many years and neither of us had a proper winter hat.

I've knit quite a few hats since I moved - and given most of them away. After all, if I give a hat away, I make room for another one to take it's place, right? Besides, how many hats does any one gal need? (Socks, of course, are an entirely different story.)

What made this Cherie's hat? Two key elements: