• Invisible Provisional, Version 2
• Italian Cast-On
I've tried lots of different cast ons and tend to lose track of what I like (and don't like) as soon as I've finished the cast on (or the project). So, I decided to work up various options, document what they look like and note my personal pros/cons.
My most recent project started with 1x1 ribbing, so that's where I'm starting. First up is ..
Invisible Provisional, version 1 (video can be found about 3/4 down on this page)
This one uses a provisional yarn knotted to the working yarn. The yarn is arranged much as it is for long-tail cast on but the working yarn is held over the thumb and provisional yarn is held over the index finger. Then a series of loops are created following an "in front, behind" ... "behind, behind" process. ("In front" of and "behind" the provisional yarn.)
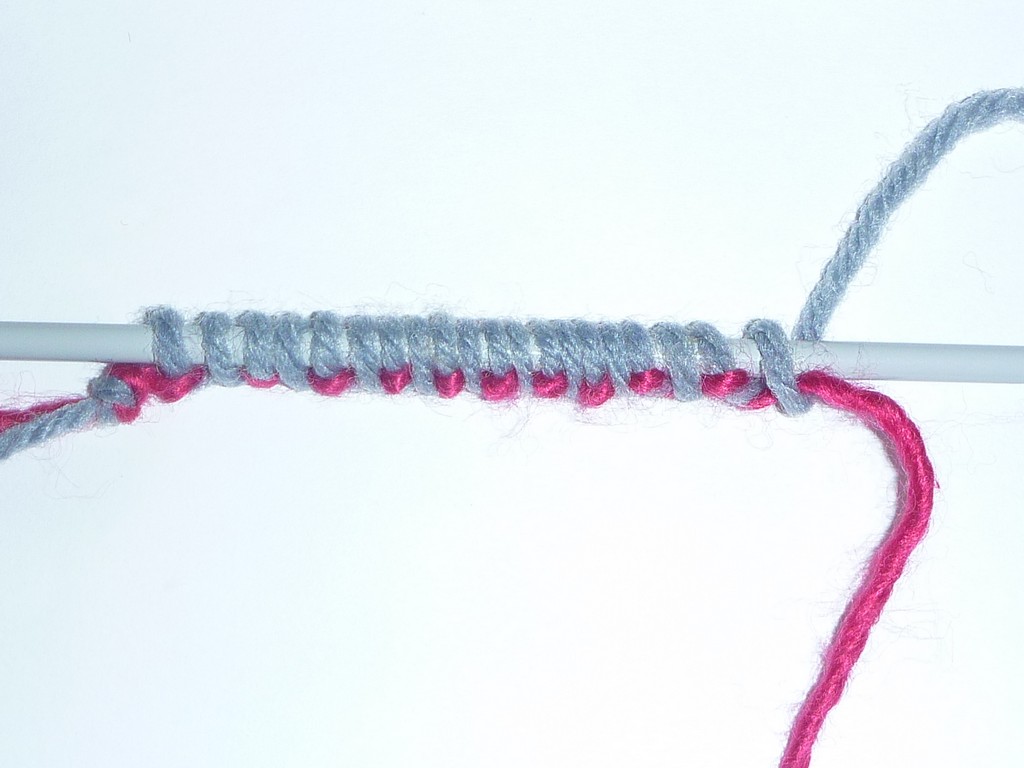
When finished, I think the “in front, behind” loop looks like a knit stitch and the “behind, behind” loop looks like a purl stitch. So, after casting on an even number of stitches, when I turned everything around to begin knitting, I was all lined up for 1x1 tubular rib (k1, slip 1 purlwise with yarn in front).
Here it is all set to begin the tubular rib.
I worked 4 rows in tubular rib followed by several rows in standard 1x1 rib (k1, p1 across). Here's the finished swatch with the provisional yarn still in place.


In this method, the "in front" loop isn't really secured until you make the "behind" loop. So, when casting on an odd number of stitches, you need to twist the yarns to secure the final loop.
Overall Outcome: First off, I LOVE the tubular edge for 1x1 rib. I thought this cast on was easy and resulted in a fairly nice edge. I'd say the main con is that you need a provisional yarn. Also, there was that one loop that needed adjustment.
Next, I tried ...
Invisible Provisional version 2
I found this in a couple places (Invisible Cast On and Provisional tail tubular cast on). As far as I can tell, these cast ons are identical except that one starts with a slip knot and the other with knotting the provisional and working yarns together.
Both are similar to Invisible Provisional version 1, except the working yarn is held over the index finger and the provisional yarn is held over the thumb (same as for long-tail cast-on). The process is slightly different than version 1, but the result is the same - a series of loops in front of and behind the provisional yarn where the "in front of" loops look like knit stitches and the "behind" loops look like purl stitches.
In this method, it's the “behind” loop that isn't secure until the next "in front" stitch is made. The first instructions advise twisting this hanging stitch. The second set of instructions say that the cast on cannot end with this hanging stitch. Both led to issues for my 1x1 ribbing.
The first instructions begin with a slip knot - which counts as the first stitch - so the hanging stitch wasn't an issue with my cast on of an even number of stitches. However, this did mean that I ended my cast on with an "in front"(knit) loop, so when I turned the work over to begin my 1x1 tubular ribbing, I was faced with a purl stitch as my first stitch.

Hmmm ... do I slip this stitch or disregard the "knit"/"purl" nature of the loops and just start in with k1, s1p tubular rib?
I decided to just start in on the tubular rib (so I was knitting "purl" loops and slipping "knit" loops). Here's the swatch with the provisional yarn still in place.


The second instructions begin with knotting the working yarn and provisional yarn together and then starting right in on the "in front" / "behind" loops. So far, so good. However, since I have to end with an "in front" loop, I have to cast on an odd number of stitches. Hmmm ... do I cast on 1 more or 1 less than I need? (I tried 1 less thinking maybe there would be instructions for an increase.)
Either way, I was once again facing a purl stitch as my first stitch. These instructions have you knit this stitch as a selvedge and then begin the tubular rib (knitting the next stitch). So, the dilemma of what to do with that opening "purl" loop is resolved, but I now have a selvedge stitch on one side, whether I want one or not. I didn't bother to finish out this swatch as I don't want a method that requires a selvedge stitch.
Overall Outcome: I don't find anything about this method or the end result that would make me select it over Invisible Provisional, version 1. That said, the part of the second set of instructions where you use a thin provisional yarn and start with a needle 2 size smaller than the main needle size is intriguing. Maybe I’ll try Invisible Provisional version 1 using this “step up” process. (Of course, that would add to the "cons" as in addition to needing a provisional yarn, I'd need to have needles of the correct type in both 1 size smaller and 2 sizes smaller than my main needles.)
On to...
Italian Cast On
I found the instructions for this cast on here. I used this cast on for a recent project and, after working about 50 stitches - carefully crossing the yarns over and under the needle as described - I realized the process for this cast on is exactly the same as Invisible Provisional version 1 (“in front, behind – behind, behind”) except that you replace the provisional yarn with a long tail of the working yarn. I switched to holding the yarn over my thumb and index finger and finished the cast on using Invisible Provisional version 1. (For me, this was much quicker than crossing the yarns.)
After realizing that the looping process is the same, the remaining question was, could I begin version 1 without a provisional yarn? Not surprisingly, the answer is "yes". Anchor the yarn to the needle with your right thumb while placing the working yarn over your left thumb and the tail over your left index finger.


Followed by "behind / behind"

Here's the final swatch with before the tail was pulled out.

Here's the swatch after the tail was carefully pulled out.

Once again, there's a little loop on the edge to be worked in.
Overall Outcome: Essentially the same as Invisible Provisional version 1 with 2 main caveats: (1) PRO - you don't need a provisional yarn and (2) CON - pulling out the tail is much trickier than pulling out a provisional yarn. I should add that I thought the before-tail-pull edge was quite nice on it's own so perhaps the tricky tail-pull could be skipped.
That's it for Experimenting with Cast-Ons - 1x1 Ribbing - Day 1.
No comments:
Post a Comment