While I haven't finished up my Shoal Bay Slouch posts, I have finished the hat. Bill took a few pics of me wearing the hat.
Turns out I didn't wear this one for very long. I gave it away to our friend Karlena. Luckily, I had enough yarn to knit a second one.
That one went with me when we flew to Fort Worth for Christmas with my family ... but it didn't come back.
“... both simpler than we can imagine, and more complicated than we can conceive.” – Goethe
Thursday, January 17, 2013
Saturday, October 20, 2012
Shoal Bay Slouch - Part 5, Almost finished
After popping the apple crisp in the oven and planning what to make for dinner (butternut squash curry), I sat back down and picked up where I left off (part 4).
A few rounds more and it became quite apparent to me that my decrease-marker-positioning math was wrong.
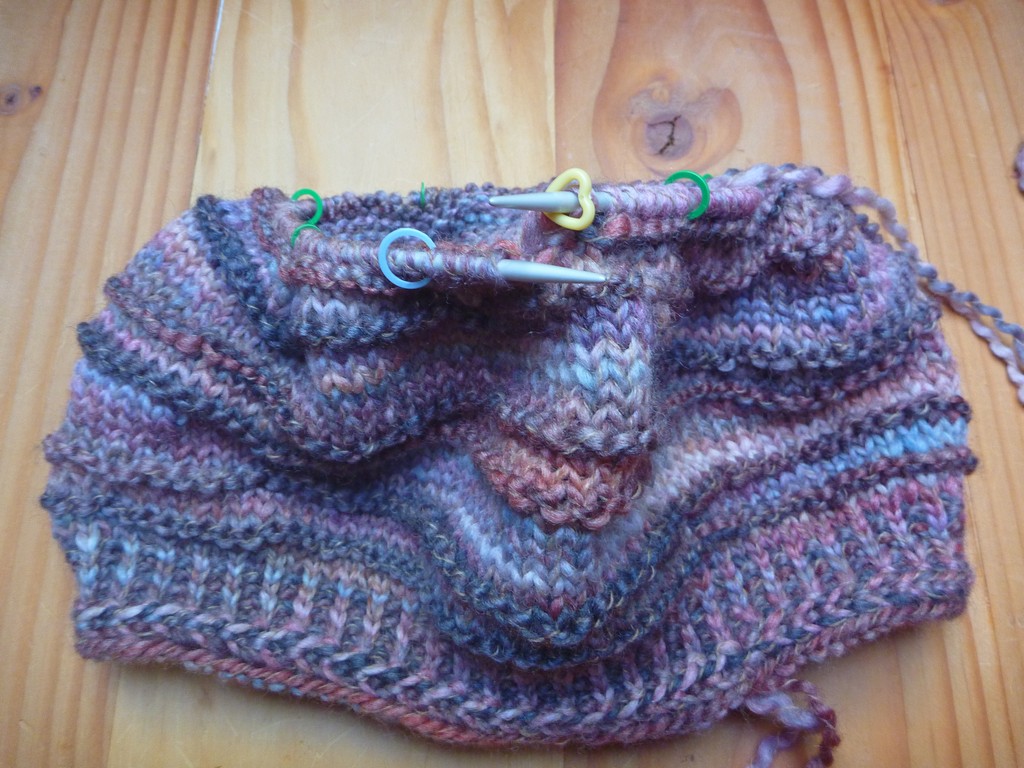
I finished my jogless join rounds
and still had 4 stitches between my end-of-round marker (yellow) and my decrease marker (blue).
My mistake was 4 x 2 for the decreases. Because, of course, when you knit 2 stitches together you don't end up with 0 stitches you end up with 1 stitch. It took me a minute to figure out the right calculations.
A few rounds more and it became quite apparent to me that my decrease-marker-positioning math was wrong.
I finished my jogless join rounds
and still had 4 stitches between my end-of-round marker (yellow) and my decrease marker (blue).
My mistake was 4 x 2 for the decreases. Because, of course, when you knit 2 stitches together you don't end up with 0 stitches you end up with 1 stitch. It took me a minute to figure out the right calculations.
Shoal Bay Slouch - Part 4, More knitting
Yesterday afternoon, I went to the post office and dropped off the last 2 boxes for my conference next week and that means my work week is finished and I can knit.
Back again after a good nights sleep, I set about planning my crown decreases. I've already figured out that I'll make 8 decreases on each decrease round and I'm planning to make the decreases at the same point in each round. My math is 112 ÷ 8 = 14 stitches between each initial decrease location and 8 stitches remaining (1 between each decrease location) after 13 decrease rounds.
When I set my project aside, I had finished the braided edge, the ribbing and the first few rounds of the main body of the hat. (Part 1, part 2 & part 3 have those details.)
I completed the first repeat of the pattern and then the second repeat and then set it aside for the night. I had come to the point where I needed to plan the crown and decided I should do that in the morning. (I tend to make mistakes when I'm tired.)
Back again after a good nights sleep, I set about planning my crown decreases. I've already figured out that I'll make 8 decreases on each decrease round and I'm planning to make the decreases at the same point in each round. My math is 112 ÷ 8 = 14 stitches between each initial decrease location and 8 stitches remaining (1 between each decrease location) after 13 decrease rounds.
Sunday, October 14, 2012
Shoal Bay Slouch - Part 3, Knitting
Oh joy, oh bliss, it's time to cast on and start knitting.
Having done my swatching, blocking (Part 1) and pattern planning (Part 2) earlier this afternoon, I just had to get started with the actual knitting.
I cast-on and did the braid (mentioned in Part 2 with a link to a video). I had an ugly twisted mess at the end of the first purl round, but by the end of the second purl round the twists were gone. I knit an inch of 1x1 rib and considered doing another round of braid, but decided against it.
Having done my swatching, blocking (Part 1) and pattern planning (Part 2) earlier this afternoon, I just had to get started with the actual knitting.
I cast-on and did the braid (mentioned in Part 2 with a link to a video). I had an ugly twisted mess at the end of the first purl round, but by the end of the second purl round the twists were gone. I knit an inch of 1x1 rib and considered doing another round of braid, but decided against it.
I really like this braided edge!
Shoal Bay Slouch - Part 2, Developing the Pattern
Having figured out my yarn and pattern and finished my gauge swatch (Part 1, Preparation), now it was time to plan my pattern. Since this is all math (and no photo opportunities), I thought I'd throw in a couple shots of my knitting environment.
My head is 22-inches around and a couple pattern standards documents I've found recommend anywhere from 1 to 2 inches of negative ease for a close-fitting hat. My idea is a bit of a slouchy hat, but I want the ribbed brim to fit. So, my brim measurement should be 20-21 inches. Using my 1x1 rib gauge of 16 st = 3-inches
21 ÷ 3 = 7 and 7 x 16 = 112 stitches
20 ÷ 3 = 6.67 and 6.67 x 16 = 106.7 stitches
I've noticed that many hat patterns use an 8 "gore" decrease in the crown section and 112 divides evenly by 8 to 14 stitches, so I decided to go with 112 stitches.
(I was sitting in the gray chair when I did these calculations. Bill usually sits in the brown one. We're still a few items shy in our home decorating and are using storage boxes as side tables.)
My head is 22-inches around and a couple pattern standards documents I've found recommend anywhere from 1 to 2 inches of negative ease for a close-fitting hat. My idea is a bit of a slouchy hat, but I want the ribbed brim to fit. So, my brim measurement should be 20-21 inches. Using my 1x1 rib gauge of 16 st = 3-inches
21 ÷ 3 = 7 and 7 x 16 = 112 stitches
20 ÷ 3 = 6.67 and 6.67 x 16 = 106.7 stitches
I've noticed that many hat patterns use an 8 "gore" decrease in the crown section and 112 divides evenly by 8 to 14 stitches, so I decided to go with 112 stitches.
(I was sitting in the gray chair when I did these calculations. Bill usually sits in the brown one. We're still a few items shy in our home decorating and are using storage boxes as side tables.)
Shoal Bay Slouch - Part 1, Preparation
Now that fall has arrived and since I Still Need a Hat, I decided to peruse my stash. I played with a couple choices and eventually settled on this:
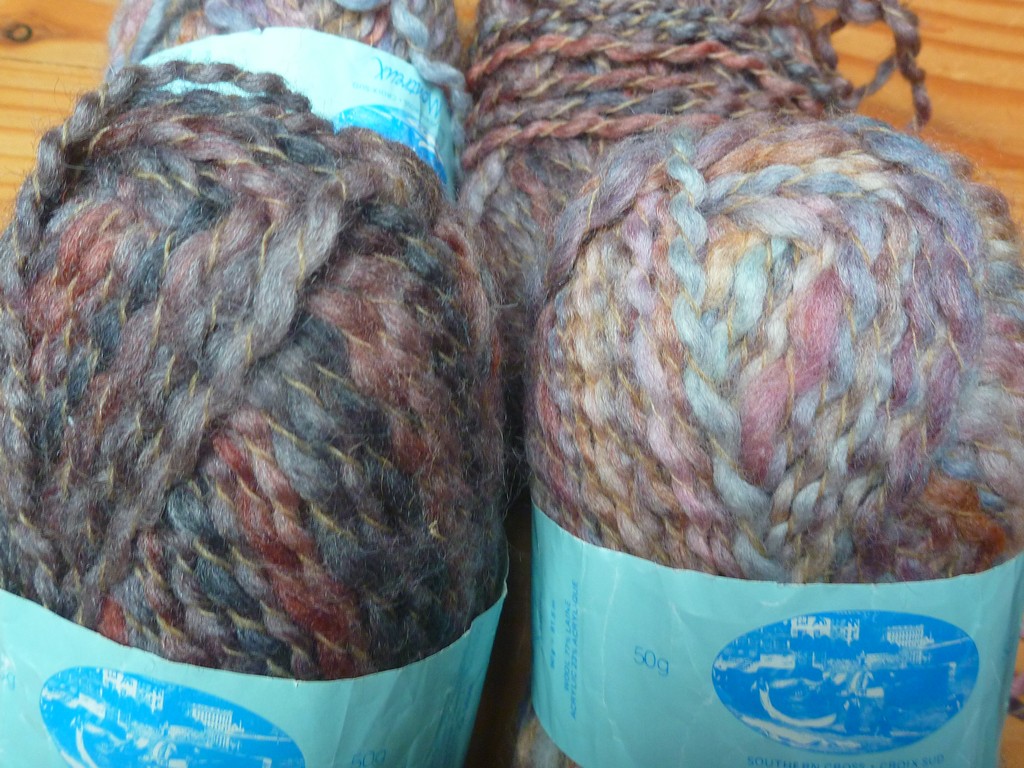
The yarn is somewhat thick-and-thin and has a fine strand in tan that's twisted together with a much thicker variegated strand. I have 4 skeins - 2 with lighter toned variegated yarn and 2 with darker toned variegated yarn - and I have no idea where or when I may have acquired this yarn.
Reading the label, the yarn is called "Montreux", it's 77% wool and 23% acrylic and it's made by Southern Cross Yarns. The skeins are 50 g (81.5 m), recommended needle size is 5.50 mm with a gauge of 16 st = 10 cm. (5.50 mm = US 9. 10 cm ≈ 4 in.)
Since I'm planning to make a hat, I'll need double-pointed needles and 16-in circular needles. Yeah, if I need to, I can make this work with a pair of circulars instead of the DPs and the 16-inch circs, but using 2 circs to knit round isn't my preferred method ... yet. (I've changed my mind on things like this in the past and fully expect to do it again.) I have DPs and 16-inch circs in size 6 (4.25 mm), so that's where I'll start my swatching.
I played with a few pattern stitches, but soon decided to let the yarn be the focus. I tried a welt stitch in the darker yarn - to give it a bit of texture ...
The yarn is somewhat thick-and-thin and has a fine strand in tan that's twisted together with a much thicker variegated strand. I have 4 skeins - 2 with lighter toned variegated yarn and 2 with darker toned variegated yarn - and I have no idea where or when I may have acquired this yarn.
Reading the label, the yarn is called "Montreux", it's 77% wool and 23% acrylic and it's made by Southern Cross Yarns. The skeins are 50 g (81.5 m), recommended needle size is 5.50 mm with a gauge of 16 st = 10 cm. (5.50 mm = US 9. 10 cm ≈ 4 in.)
Since I'm planning to make a hat, I'll need double-pointed needles and 16-in circular needles. Yeah, if I need to, I can make this work with a pair of circulars instead of the DPs and the 16-inch circs, but using 2 circs to knit round isn't my preferred method ... yet. (I've changed my mind on things like this in the past and fully expect to do it again.) I have DPs and 16-inch circs in size 6 (4.25 mm), so that's where I'll start my swatching.
I played with a few pattern stitches, but soon decided to let the yarn be the focus. I tried a welt stitch in the darker yarn - to give it a bit of texture ...
Monday, August 6, 2012
Summer Heatwave - Lopez Style
It started on Friday with a forecast high of 78°. Before that, I don't think we'd broken 70°. OK, I'm sure that's a bit of an exaggeration, but it sure doesn't seem like we've spent much time in the 70s this summer. In fact, a couple weeks ago, I actually lit a fire in the wood stove. That's the only heat source we use in the big room (aka the "nave") and it was 65° when I got up that morning. I was cold, it was rainy and the forecast was for more of the same with a high of 60° - so I wasn't going to get any help from the sun.
I haven't built a fire since then, but we haven't had any really hot days either. We'd been told by the previous owners (Mike & Jen) that the place really never got hot inside. I thought I'd monitor what happened during out little Lopez heat wave.
Here we are on Friday morning at about 7:30 am with a nave temperature of 65°. (Yep, that's right, with absolutely no air-conditioning the inside temperature on the morning of August 3rd was 65°.)
I haven't built a fire since then, but we haven't had any really hot days either. We'd been told by the previous owners (Mike & Jen) that the place really never got hot inside. I thought I'd monitor what happened during out little Lopez heat wave.
Here we are on Friday morning at about 7:30 am with a nave temperature of 65°. (Yep, that's right, with absolutely no air-conditioning the inside temperature on the morning of August 3rd was 65°.)
Subscribe to:
Posts (Atom)